Can you use the catalog gripping force with longer fingers?
For a recessed part, check how force is defined, where the fingers contact it and which finger-load limits apply before choosing a gripper.
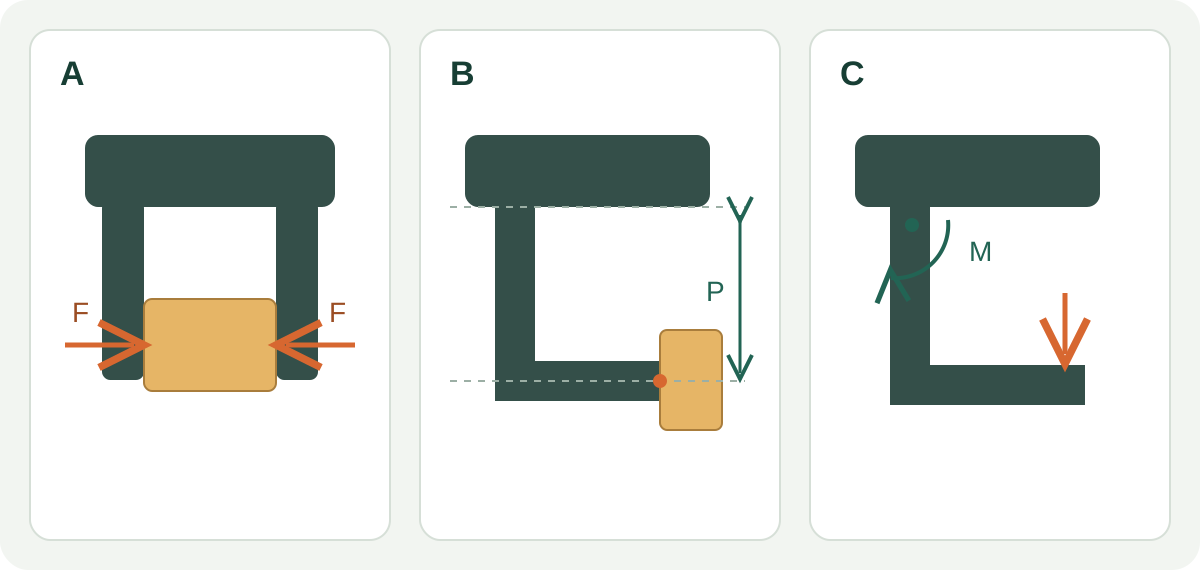
Check what the force number includes
Do not assume a catalog force applies unchanged after fitting longer fingers. First check the definition: SMC's MHZ external-grip charts on printed page 387 define F as the force of one finger in the illustrated contact condition. SCHUNK's PZN-plus notes define gripping force as the sum of the individual jaw forces at distance P. These are examples from different products, not CBOXTEC ratings.
Write ‘per finger’ or ‘total across the jaws’ beside every value in a comparison. Also record whether it describes external or internal gripping. Two numbers with the same unit may still describe different conditions.
Locate the actual contact point
SMC's chart uses gripping point L and separate pressure curves. SCHUNK defines P from a reference surface and provides force-versus-P diagrams. The useful dimension is therefore the one shown in that model's drawing, not an overall finger length measured from a convenient edge.
For a part sitting below a tray rim, mark where the proposed fingers actually touch it. Read the relevant curve for that location, gripping direction and operating condition. If the drawing or curve does not cover the proposed geometry, ask the manufacturer to evaluate it; a simple inverse-length rule is not a substitute.
Read the finger limits as separate limits
The SCHUNK example lists permissible finger length, mass per finger and jaw moments separately. A gripping-force value alone does not answer all of those checks.
On your requirements sheet, keep the contact-force assessment beside the finger mass and load assessment. Ask which limits apply together to the proposed fingers. Do not treat a pressure increase as an automatic remedy for an unsuitable geometry.
- SCHUNK — PZN-plus 50-1-EX, ID305010, technical details and general notes (undated page) · Accessed 2026-10-15
Make the drawing useful to the reviewer
Our application guidance is to send a dimensioned view of the gripper reference, finger mounting face, contact pads and part contact area. Include finger material and mass, the part's mass and surface condition, the gripping direction and the intended motion. For pneumatic options, state the available pressure and how it will be checked during operation.
A tray or loading sketch should show why the extra length is needed, such as a rim that the finger must clear. That lets the reviewer consider a shorter finger, a different contact location or another gripper against the same requirement. These are choices to assess, not promised modifications or compatibility.
Ask for a result tied to that grip
Ask for the force definition, reference drawing, applicable curve and finger-load check for the exact proposed model and fingers. Any later retention trial needs its own agreed conditions; a catalog figure or this sketch does not prove that the part will remain held throughout motion.
CBOXTEC supplies robot arms and grippers. Share the part and finger requirements when discussing selection. Loading and tray handling are application contexts here; this article does not establish a model's suitability or an installation's performance.